Now that I've nearly reached the end of my project list for the animations, I wanted to create this topic to use as a brain dump for all things anis. I will warn you that while I'm going to try to keep things simple, there will be a bunch of technical jargon used in this thread. I can't stress this enough. I want other people to jump into the ani scene and I'm super willing to help. However, I would much rather help over a Skype call with a screen share vs spending 100s of hours making videos and tutorials that 3 people even look at.
Brain dump commence!!!!!
Topic 1 - What is an Ani? The file structure of a Links 2003 animation
The first thing you need to know about a Links 2003 animation file is the file structure that makes up the animation. A Links animation file (ani) is really just an archive not much different than a zip file. The difference is that instead of a zip utility to compress and pack the files, Links has a proprietary utility called ac2003.exe (archiver). I received ac2003.exe from one of the original animasters back on February 12, 2024. Without the archiver, the file structure that I'm about to explain can't be modified without breaking the ani file. However, with the archiver a person can literally create an infinite number of texture combinations for the ani they are creating. I was told I couldn't share the archiver, but in all honesty, I don't think any of the still living original animasters would really care. If you really want to tackle this ani thing in depth just let me know and I'll ask.
So what's in the .L3 animation archive?
Most importantly texture files with the below naming conventions. However, if you have access to the Maya model you could literally make these whatever you wanted. I have access to Maya and I've tested it.
Eye - L_S01_EYE_01.BMP - This is the eye file. It's a 1024x1024 file of an eyeball. It's odd, but it's the eye that you see when you look at a S01 Sergio hat model ani. You are required to have at least one eye texture in the archive because it's called on in the SKL maya file. I typically have 1 eye file for every face even though faces with similar eye colors might use the same file.
Face - L_S01_FACE_01.BMP - This is the face file. It's a 1024x512 of the anis face. It's also a bit odd to look at, but obviously if you want your ani to have a face it's required that you have one. Also obvious, you need a face file for every face you want to be able to choose from within the game.
Button - L_S01_GRN-Button.BMP - This is the button file that you see on the anis polo shirt. It's a 1024x1024 file. It is required to have one because it's called on in the SKL file, but you could have one for each shirt if you really wanted to have shirts with unique buttons. I almost always just have a single button file in my ani archive.
Hat - L_S01_HAT01_01.BMP - This is the hat file. It's a 1024x256 file. It is required to have at least one in the archive because of it being in the SKL file. The number of hats I typically have depends on whether it's a PGA golfer or a non-PGA golfer. For PGA golfers, I usually include the same hats they wear so that could be 1 or 2 all the way up to 10 or 12. For non-PGA anis, I always include a bunch of hats just to give the person using the ani as many choices as possible in the game. The hat file becomes the hair texture on the hatless ani and part of the hair texture on the visor ani.
Pants - L_S01_PANTS01_01.BMP - This is the pants file. It's a 1024x1024 file. It is required to have at lease one because of the SKL file. How many that are in the ani is up to the creator of the ani, but the more you have the more choices the person using the ani has in the game. The pants file becomes the shorts file on the shorts version of the S01 ani.
Shirt and Collar - L_S01_SHIRT01_01.BMP and L_S01_SHIRT01_CLR_01.BMP - This is the shirt and collar files. The shirt is a 1024x512 file and the collar is a 1024x256 file. At least one of each is required to be in the ani archive. Again, the number you have in the archive depends on how many shirts choices you want the person using the ani to have.
Shoes - L_S01_SHOE_01.BMP - This is the shoe file. It's a 1024x1024 file. At least one is required to be in the archive. Much like the pants, hats and shirts, the number you have in the ani archive just depends on how many choices you want to provide.
Skin - L_S01_SKIN_01.BMP and L_S01_SKING_01.BMP - These are the arm files. They are 1024x512 files. The one without the G is the arm file without the glove. The one with the G is the arm file with the glove. You want to make these match so the golfers arms are the same skin tone. This also means you almost always need a skin file for each face and the arm skin tones will usually need to match the face skin tones. If this sounds like a pain in the ass, it is. The very first thing I do with every ani I make is create the face and then match the skin tone of the face with the arms. That's a process that I plan on explaining later in this thread. There is at least one of each required to be in the ani archive.
Legs - L_S01_LEGS_01.BMP - This is the legs file. It is a 1024x512 file. This is only needed with the shorts wearing version of the S01 model and the skin tone needs to match the face and arms. If creating a shorts wearing model of the S01 ani, at least one is required to be in the archive.
Socks - L_S01_SOCKS_01.BMP - This is the socks file. It is 1024x1024 file. This is only needed with the shorts wearing version of the S01 model and at least one is required to be in the ani archive.
What the Hell is a SKL file?
If you've read this far you've noticed that the SKL files are mentioned often above when explaining the textures. The SKL file is a binary version of the ASCII Maya file that stores the mesh frame of the ani along with the texture mapping. Without the SKL files, the animation simply won't work in the game. Each animation actually has two SKL files, but they are identical copies. You can think of them as twins.
I don't want to get too birds and the bees here, but the SKL files are where the animation begins (or is conceived if you think birds and bees). The SKL files start out as .MA files, which are simply Maya ASCII files. The .MA files contain coordinates, texture mapping, animation abilities and a bunch of other things that basically define how the animation looks and moves in the game. Because they are ASCII files, the .MA files can be modified in two ways. One is to simply change values by opening the .MA in notepad and the other is to open the .MA in Maya and physically make the adjustments by modifying the wire mesh of the model. I do most of my modifications in Maya, but I had to originally change texture names and paths to the textures using notepad. I rarely have a need to use the notepad method now that everything has been setup.
Once I have the .MA file looking exactly like I want it, I save it with an appropriate name (BigSexyJC.MA for example). Once I have the .MA ready, I need to export it to it's binary version, the SKL files. To do that, my good ole buddies known as the original animasters hooked me up with exportSkeletonSA.exe (aka the Exporter). The exporter and the archiver are both DOS command line executables. I'm an old IT guy so I learned originally with DOS syntax and just created two batch files (I'll post those later in this thread) that jump through a series of steps to export the .MA to SKL files and then build the archive. It was actually pretty cool to write those from scratch and then see them work beautifully as designed.
As I mentioned, the SKL files are binary so you need a hex editor or a fancy notepad utility to open/edit them. Be careful if you try this though because if one bit is wrong it will break the ani. Once I use the exporter to create the SKL files, I add the SKL files to my folder with all the textures and the other files that make up the .L3 ani archive.
So What Else is in There?
In addition to the .BMP texture files and the two .SKL files the animation has a bunch of other important files within it's archive. First, there are 177 .CLP files in every .L3 archive. These .CLP files are the animation clips that allow the ani to show reactions and swing and any other movements it does in the game. These are binary files and I've looked at them in a hex editor, but can't make much of it. They won't open in Maya either so I've done next to nothing with these. They are vital files though, because without them the ani won't work in the game.
Next there are 8 .TXT files within the .L3 ani archive. While these are the simple .TXT files that can be opened in notepad, they are vitally important files. 7 of the files (CHIPSWING.TXT, DRIVERSWING.TXT, IRONHALFSWING.TXT, IRONSWING.TXT, PUTTERLONG.TXT, PUTTERMEDIUM.TXT and PUTTERSHORT.TXT) define the timing/length/sequence of the swings they mention with their name. I think if you wanted to customize an animations swing to look like a real life swing, these are the files to modify. I have tinkered with them and they 100% make a difference and could be modified infinitely. I will post these later in this thread so we can discuss them in more detail.
The last .TXT file is the Script.TXT file and he is one badass of a file. This file is customizable and would be the most beneficial to learn if you want to modify how the textures are configured for an ani and how the reactions are configured for an ani. You want outfits instead of pants and shirts choices, this is your guy. You want to remove the throw a temper tantrum reaction from an ani, this is your guy. You want to define how many items are able to be selected in the game, this is your guy. I will go into great depth on how to use this file later in this thread.
What About the Rest?
There are a few more files remaining that make up the .L3 ani archive, but these files range from not very important at all to not even needed.
Driver.SKL, Iron.SKL, Putter.SKL - These are the wire mesh files for the driver, irons and putter, but they are no longer really used by the ani. When the game was originally created, there wasn't an option to choose clubs so the clubs a golfer used were defined with the ani archive itself. Then one of the patches (I cant remember which) gave us the option to create custom clubs and now we are able to select the club set we want an ani to use from within the game. That made these files obsolete, but I still keep them in my archives. They aren't required though.
Clubs_s.TGA, Clubs256.TGA and Iron.TGA - You can pretty much read the paragraph above and the same goes for these. These are just the textures that went with the SKLs mentioned above when the game first came out prior to being able to select the clubs from within the game. They aren't required, but I keep them in the archive for nostalgia reasons.
MAKEFILE.MAK, MSSCCPRJ.SCC, VSSVER.SCC, msvcr70.dll, NMAKE.EXE, ac2003.EXE - None of these files are required to be in the archive. I really just never bothered to remove them. The first 5 were used by MS and the original animasters to create the anis using a more sophisticated process that isn't necessary now. The last one is the archiver. Oops, I shouldn't have mentioned that. I guess if you can find the correct golfer utility and extract that file then you have a copy. That doesn't explain how the hell to use it, but you will be one of few on the planet to have it.
Post 1 of anatomy of an ani complete, but definitely more to come!!!!
The Anatomy of an Ani
-
Big Sexy JC
- Posts: 307
- Joined: November 15th, 2022, 8:10 am
- Location: Indiana
-
Big Sexy JC
- Posts: 307
- Joined: November 15th, 2022, 8:10 am
- Location: Indiana
Re: The Anatomy of an Ani
Topic 2 - The Script.TXT file
One of the biggest breakthroughs I made in my ani learning adventure was to modify the golfer utility to see all the different files that made up the ani. I'll get more into the golfer utility later, but the 2nd biggest breakthrough was definitely figuring out the Script.TXT file. As the name suggests, it's just a simple text file that can be opened in notepad and modified very easily. The purpose of this post is to define everything included in the file and to show you the benefits of modifying it.
First, if you use the GolferUtilityTXT.exe and open any golfer (.L3 file) you will see all the .TXT files contained in the .L3 archive. If you extract the Script.TXT file you can modify it and then re-add it to the archive after saving your changes. I would keep the original in a safe place because even the smallest typo in the script.txt file can break the ani. Don't worry though, you can always just add the "good" script.txt back to the ani to fix it.
I'll post the entire script.txt file below, but I want to break it up into pieces for the purpose of this post. I'll start at the top and work my way down the file.
The below lines are at the very top of the file. Any line that starts with a ; is not read by the file and can be comments, etc. Any time you open a script.txt with the below two lines you know it's one of my anis created off the minimal reactions script file that I've used with every ani I've ever created. The original animasters also used the top 2 or 3 lines of commented out lines for a similar reason so if you open one of their anis you will see something similar.
;created by BSJC 30-Jan-2024
;BSJC Source Ani
Of the below 7 lines, only two of them are important and I've bolded them. The name line is simply that. It displays the name of the golfer/ani. Don't get this confused with the PIN name of a golfer though. I could have a PIN (human or AI golfer) named Tiger Woods that is using the BSJCDJ ani.
The cumstomizable parts = line defines how many customizable choices a person will see in the game that they select. I'll show you how to configure that in a sec and how the two areas of the script work together. One last thing to note here. Cumstomizable is spelled wrong. If you correct the spelling you will break the ani. I learned that the hard way and it took forever to figure it out. You never assume a word is mis-spelled in a file that configures part of a game, but that is the case here. Not sure if it was done on purpose by MS, if it was an accident, or given how the word is mis-spelled if it was MS using a clever/funny way to add some security to the file. Who knows?
[Details]
Name=BSJCDJ;this is the display name of the golfer
Cumstomizable Parts=4;number of textures that are customizable in the game
Customizable Mesh=1; this is a 1 or a 0, 1 if there is a customizable mesh, 0 otherwise
Extrema=crownLocator buttLocator LeftToeEnd RightToeEnd brimLocator leftShoulderLocator rightShoulderLocator RightElbow LeftElbow RightMiddleKnuckle LeftMiddleKnuckle rightHeelLocator leftHeelLocator clubJoint
ClubExtrema=clubHeadLocator clubHeadLocatorAft clubHeadLocatorFore
The 10 lines below point to files that are needed to define the mesh name (SKL) of the anis body and the clubs along with the textures for the clubs. After the patch to allow custom clubs, the underlined lines below were made obsolete. I leave them in the file, but they technically aren't used. I explained the SKL files in my first post, but the two bolded lines below tell the game the name of the SKL files being used in a particular ani. You could name these whatever you wanted as long as you define them correctly in the below lines. For example, I could have a TigerWoods.SKL or a JustinThomas.SKL instead of SERGIO_BOUND.SKL, but for simplicity reasons I always use the below names and keep my individual SKL files with the golfers name on my hard drive after renaming them.
[file_locations]
; any files that are needed by this animation that are not listed here are assumed to be in the same archive as this script
golfer.skl=SERGIO_BOUND.skl
golfer_low.skl=SERGIO_LOW_BOUND.skl
putter.skl=clubs.l3|putter.skl
iron.skl=clubs.l3|iron.skl
driver.skl=clubs.l3|driver.skl
clubs256.tga=clubs.l3|clubs256.tga
clubs_s.tga=clubs.l3|clubs_s.tga
iron.tga=clubs.l3|iron.tga
The bolded lines below are wear the magic happens. This area of the script.txt works in conjunction with the Cumstomizable Parts line I already mentioned. If you choose 4 Cumstomizable parts then you MUST define 4 customizable parts in the below section. This is what determines whether you can choose pants, shirts, hats, shoes, sleeves, faces or if you just get outfits. I'll give an example of the difference below. Any textures that are needed in any given part need defined in that parts section. The max Cumstomizable parts is 5.
In the underlined section below I'll explain why they are grouped the way they are. I put the face (face), the arms (SKIN and SKING) the hair (hat01) and the eye (EYE) in Part 1 together because they are all uniquely relevant to that specific face. In other words, the arms match the face and the hair goes with the face and the eye goes with the face. In customizable part 2 below you see the shirt (Shirt01) and the collar (Shirt01_CLR) are grouped together because the collar obviously needs to go with the shirt. In parts 3 and 4 the Pants (Pants01) and the Shoes (SHOE) are by themselves in a section because they are stand alone choices in the game.
[customizable part 1]
Title=Sexy Looks
Varieties=22
Textures=5
Texture1=L_S01_face_%%.bmp
Texture2=L_S01_SKIN_%%.bmp
Texture3=L_S01_SKING_%%.bmp
Texture4=L_S01_hat01_%%.bmp
Texture5=L_S01_EYE_%%.bmp
[customizable part 2]
Title=Sexy Shirts
Varieties=20
Textures=2
Texture1=L_S01_Shirt01_%%.bmp
Texture2=L_S01_SHIRT01_CLR_%%.bmp
[customizable part 3]
Title=Sexy Pants
Varieties=22
Textures=1
Texture1=L_S01_Pants01_%%.bmp
[customizable part 4]
Title=Sexy Shoes
Varieties=25
Textures=2
Texture1=L_S01_SHOE_%%.bmp
In the section below, you can see how I create entire outfits. This was pulled from the Aaron Baddeley script.txt file and I didn't want his pants, shirts and hats to be broken up so I grouped them together. As you cycle through the outfits in the game, the pants, shirts and hats will all be tied together because of how I setup the parts below. Because he has multiple faces to choose from and the options of having sleeves or not, I needed to create separate parts for those.
[customizable part 1]
Title=Sexy Looks
Varieties=4
Textures=2
Texture1=L_S01_FACE_%%.bmp
Texture2=L_S01_EYE_%%.bmp
[customizable part 2]
Title=Sexy Outfits
Varieties=14
Textures=5
Texture1=L_S01_Shirt01_%%.bmp
Texture2=L_S01_Shirt01_CLR_%%.bmp
Texture3=L_S01_Pants01_%%.bmp
Texture4=L_S01_HAT01_%%.bmp
Texture5=L_S01_HAT01_%%_R.bmp
[customizable part 3]
Title=Sexy Sleeves
Varieties=8
Textures=2
Texture1=L_S01_SKIN_%%.bmp
Texture2=L_S01_SKING_%%.bmp
[customizable part 4]
Title=Sexy Shoes
Varieties=10
Textures=1
Texture1=L_S01_SHOE_%%.bmp
The last example I'll explain is below. This is from Dustin Johnson. I wanted his arms, hats, pants, shirts and shoes to all be together in an outfit so I included them all in the same part. Part 1 was setup because he has multiple face choices so I needed a separate part to define those.
[customizable part 1]
Title=Sexy Looks
Varieties=2
Textures=1
Texture1=L_S01_FACE_%%.BMP
[customizable part 2]
Title=Sexy Outfits
Varieties=9
Textures=8
Texture1=L_S01_SKIN_%%.bmp
Texture2=L_S01_SKING_%%.bmp
Texture3=L_S01_HAT01_%%.bmp
Texture4=L_S01_HAT01_%%_R.bmp
Texture5=L_S01_PANTS01_%%.bmp
Texture6=L_S01_SHIRT01_%%.bmp
Texture7=L_S01_SHIRT01_CLR_%%.bmp
Texture8=L_S01_SHOE_%%.bmp
This last section of the script.txt file is the pretty large section below that defines where all the animations come in to play. If you remember the CLP files that I mentioned above, this is where the game calls on those during game play. While all of this info is relevant, I've bolded and underlined the important parts that I will extract out and paste below so I can explain in more detail.
;Event Key
;0 = Top of Backswing
;1 = Play swing sound
;2 = Launch the ball
;3 = Ball Lands
;4 = Ball closest to hole
;5 = Ball in hole
;6 = Ball stops rolling
[Driver]
Address=DriverAddress
PreSwing=DriverAddressBreath,DriverAddressRelaxingBreath,DriverRockFeet,DriverWaggle,DriverLookAt,DriverWaggleCombo
Swing=DriverSwing( 2@39)
FinishBreath=DriverFinishBreath
Finish2Neutral=DriverFinishToDriverNeutral
NeutralBreath=DriverNeutralBreath
InFlightReactions=DriverShortGoodFistPumpSmall( 3@67),DriverShortEnglishRight( 3@205),DriverShortGoodFistPumpLarge( 3@51),DriverShortBadTapDivot( 3@27),DriverShortOKSpinClub( 3@15),DriverShortEnglishLeft( 3@205),DriverShortBadPractice( 3@50),DriverShortEnglishForwardBody( 3@55),DriverShortOKShieldEyes( 3@30),DriverShortGoodKissClub( 3@45)
PostFlightReactions=DriverLongGoodDoublePump( 6@44),DriverLongBadShakeHead( 6@49),DriverLongInHoleFistPumpLarge( 5@50),DriverLongOKTapGround( 6@44),DriverLongGoodThumbsUp( 6@25),DriverLongBadHandOnHip( 6@36),DriverLongBadTapClubHead( 6@11),DriverLongOKShieldEyes( 6@201),DriverLongInHoleRaiseArms( 5@75)
PostFlightIdle=DriverCheckGrip,DriverShiftWeight,DriverTapGround,DriverLookAtClub,DriverPracticeSwing,DriverTechnicalPracticeSwing
Neutral2Stretch=DriverNeutralToDriverStretch
StretchBreath=DriverStretchBreath
Stretches=DriverStretchBackFront,DriverStretchBackBehind,DriverStretchBackBend,DriverStretchSide
Stretch2Neutral=DriverStretchToDriverNeutral
[Chip]
Address=ChipAddress
PreSwing=ChipAddressBreath,ChipAddressRelaxingBreath,ChipAddressAdjustGrip,ChipWaggle,ChipRockFeet,ChipLookAt,ChipWaggleCombo
Swing=ChipSwing( 2@28)
FinishBreath=ChipFinishBreath
Finish2Neutral=ChipFinishToIronNeutral
NeutralBreath=IronNeutralBreath
InFlightReactions=ChipShortInHoleArmsUp( 5@33),ChipShortGoodSmallPump( 3@50),ChipShortOKCleanClub( 3@45),ChipShortBadPracticeSwing( 3@84),ChipShortCloseDip( 3@25),ChipShortInHolePoint( 5@60),ChipShortGoodWave( 3@30),ChipShortOKSpinClub( 3@40),ChipShortBadShakeHead( 3@50)
PostFlightReactions=IronLongGoodSoftFistPump( 6@77),IronLongInHoleArmsUp( 5@73),IronLongInHoleFistPumpLarge( 5@36),IronLongOKCleanClub( 6@70),IronLongBadShakeHead( 6@80),IronLongGoodWave( 6@60),IronLongOKTapGround( 6@60),IronLongBadHandOnHip( 6@70),IronLongEnglishRight( 6@165),IronLongEnglishLeft( 6@165),IronLongCloseDipLookUp( 6@30),IronLongEnglishForwardBody( 6@155)
PostFlightIdle=ChipPracticeSwing,IronTapGround,IronLookAtClub
Neutral2Stretch=IronNeutralToIronStretch
StretchBreath=IronStretchBreath,
Stretches=IronStretchBackFront,IronStretchBackBehind,IronStretchSide
Stretch2Neutral=IronStretchToIronNeutral
[Iron]
Address=IronAddress
PreSwing=IronAddressBreath,IronLookAt,IronRockFeet,IronWaggle,IronWaggleCombo
Swing=IronSwing( 2@37),IronHalfSwing( 2@41)
FinishBreath=IronFinishBreath
Finish2Neutral=IronFinishToIronNeutral
NeutralBreath=IronNeutralBreath
InFlightReactions=IronShortInHoleRaiseArms( 5@46),IronShortGoodDoubleFistPump( 3@40),IronShortOKCleanClub( 3@52),IronShortBadPractice( 3@63),IronShortEnglishRight( 3@100),IronShortEnglishLeft( 3@101),IronShortInHolePump( 5@75),IronShortGoodFistPumpLarge( 3@52),IronShortOKSpinClub( 3@30),IronShortBadTapDivot( 3@56)
PostFlightReactions=IronLongGoodSoftFistPump( 6@75),IronLongInHoleArmsUp( 5@71),IronLongInHoleFistPumpLarge( 5@37),IronLongOKCleanClub( 6@20),IronLongBadShakeHead( 6@45),IronLongGoodWave( 6@35),IronLongOKTapGround( 6@45),IronLongBadHandOnHip( 6@65),IronLongEnglishRight( 6@180),IronLongEnglishLeft( 6@180),IronLongCloseDipLookUp( 6@25),IronLongEnglishForwardBody( 6@145)
PostFlightIdle=IronTechnicalPracticeSwing,IronTapGround,IronLookAtClub
Neutral2Stretch=IronNeutralToIronStretch
StretchBreath=IronStretchBreath
Stretches=IronStretchBackFront,IronStretchBackBehind,IronStretchSide
Stretch2Neutral=IronStretchToIronNeutral
[Putter]
Address=PutterAddress
PreSwing=PutterAddressBreath,PutterRockFeet,PutterLookAt,PutterWaggleCombo,PutterCleanClubPants,PutterShakeArm
Swing=PutterLong( 2@32),PutterMedium( 2@30),PutterShort( 2@31)
FinishBreath=PutterFinishBreath
Finish2Neutral=PutterFinishToPutterNeutral
NeutralBreath=PutterNeutralBreath
InFlightReactions=PutterShortInHolePoint( 5@33),PutterShortGoodSoftFistPump( 6@78),PutterShortBadHangHead( 6@24),PutterShortVeryBadHandsOnHead( 6@55),PutterShortCloseDip( 6@75),PutterShortGoodWave( 6@34),PutterShortInHoleHardPump( 5@45),PutterShortCloseDipLookUp( 6@75),PutterShortBadCheckStroke( 6@40),PutterShortVeryBadHandsOnKnees( 6@85),PutterShortInHoleRaiseandPump( 5@76),PutterShortBadTurnAway( 6@65),PutterShortVeryBadLookUp( 6@40),PutterShortBadShakeHead( 6@70),PutterShortBadForehead( 6@50)
PostFlightReactions=PutterLongVeryBadThrowClub( 6@35),PutterLongInHolePunch( 5@57),PutterLongGoodSoftFistPump( 6@61),PutterLongCloseDipLookUp( 6@110),PutterLongBadHangHead( 6@60),PutterLongGoodWave( 6@35),PutterLongBadForehead( 6@50),PutterLongInHoleArmsUp( 5@56),PutterLongCloseDipForehead( 6@75),PutterLongInHolePoint( 5@85),PutterLongGoodCap( 6@70),PutterLongBadTurnAway( 6@60),PutterLongCloseDip( 6@82),PutterLongEnglishBody( 6@150)
PostFlightIdle=PutterPracticeSwing,PutterTapGround,PutterBrushGround,PutterFixDivot
FollowThrough=PutterShortFollowThrough,PutterLongFollowThrough,PutterMediumFollowThrough
;Neutral2Stretch=
;StretchBreath=
;Stretches=
;Stretch2Neutral=
I've pasted 3 different reaction sets below. The first one is my "realistic" reactions set. I've removed all the temper tantrum and over the top dramatic reactions.
Big Sexy JC Reactions
InFlightReactions=DriverShortGoodFistPumpSmall( 3@67),DriverShortEnglishRight( 3@205),DriverShortGoodFistPumpLarge( 3@51),DriverShortBadTapDivot( 3@27),DriverShortOKSpinClub( 3@15),DriverShortEnglishLeft( 3@205),DriverShortBadPractice( 3@50),DriverShortEnglishForwardBody( 3@55),DriverShortOKShieldEyes( 3@30),DriverShortGoodKissClub( 3@45)
PostFlightReactions=DriverLongGoodDoublePump( 6@44),DriverLongBadShakeHead( 6@49),DriverLongInHoleFistPumpLarge( 5@50),DriverLongOKTapGround( 6@44),DriverLongGoodThumbsUp( 6@25),DriverLongBadHandOnHip( 6@36),DriverLongBadTapClubHead( 6@11),DriverLongOKShieldEyes( 6@201),DriverLongInHoleRaiseArms( 5@75)
Below is the default reactions that are in almost every animaster ani and original game ani. This includes the club breaking, foot stomping, club throwing, etc. reactions you see in the game.
Default Reactions
InFlightReactions=DriverShortGoodFistPumpSmall( 3@67),DriverShortEnglishRight( 3@205),DriverShortGoodFistPumpLarge( 3@51),DriverShortBadTapDivot( 3@27),DriverShortVeryBadHitGround( 3@13),DriverShortOKSpinClub( 3@15),DriverShortEnglishLeft( 3@205),DriverShortBadPractice( 3@50),DriverShortVeryBadBreakClubKnee( 3@20),DriverShortEnglishForwardBody( 3@55),DriverShortOKShieldEyes( 3@30),DriverShortGoodKissClub( 3@45),DriverShortBadStompFoot( 3@50),DriverShortVeryBadBreakClubHead( 3@30)
PostFlightReactions=DriverLongGoodDoublePump( 6@44),DriverLongBadShakeHead( 6@49),DriverLongVeryBadBreakClub( 6@30),DriverLongInHoleFistPumpLarge( 5@50),DriverLongOKTapGround( 6@44),DriverLongGoodThumbsUp( 6@25),DriverLongBadHandOnHip( 6@36),DriverLongVeryBadFakeThrowClub( 6@25),DriverLongBadTapClubHead( 6@11),DriverLongOKShieldEyes( 6@201),DriverLongVeryBadKickGround( 6@40),DriverLongInHoleRaiseArms( 5@75)
NORM Reactions = Animasters ani with no reactions at all
InFlightReactions=
PostFlightReactions=
I'll wrap up this script.txt post with this. When editing the reactions, you have to be aware of the frames and event that you are impacting with your edits. The event key below shows the prefix that defines the specific event and in the script the event number will be followed by @ and a frame number. For example, an entire drive takes approx 200 frames. If you start to remove reactions you allow the entire sequence of events happen at a different pace so you have to test to make sure the swing and ball impact still look right and line up correctly. It will take some play testing, but once you have it nailed down you are good. In most cases you can adjust everything just by tweaking the Swing=DriverSwing( 2@38) value in the appropriate direction to make ball contact timing accurate.
;Event Key
;0 = Top of Backswing
;1 = Play swing sound
;2 = Launch the ball
;3 = Ball Lands
;4 = Ball closest to hole
;5 = Ball in hole
;6 = Ball stops rolling
I know this is a bunch of reading with some technical mumbo jumbo, but hopefully it's helpful.
-
Big Sexy JC
- Posts: 307
- Joined: November 15th, 2022, 8:10 am
- Location: Indiana
Re: The Anatomy of an Ani
Topic 3 - Creating an Ani
While there are still a few files to cover that are within the ani archive, they are files I haven't messed with as much so I'll save them for later and move ahead to more important stuff. More important stuff like actually creating an ani. I will have a topic on graphics software and editing the textures, but for the purpose of this post, I'm going to assume you have the textures you want for your ani.
Homemade vs. Store Bought???
There are essentially two ways you can create an ani. I'll explain both here so this might get lengthy. I would compare the two ways to buying all the ingredients for cookies and then coming home and mixing everything together and baking them vs. walking into a store and grabbing some pre-made cookies off the store shelves. The final results of both cookies might not be too terribly different, but we all know which one is better; the homemade ones of course. Much like you have more control over the ingredients and everything that goes into the process of the homemade cookies, it's very similar when it comes to creating an ani from scratch vs. building something from a pre-existing one.
I'll explain the homemade from scratch ani first, but before I get into that I have to mention that until I received the exporter and archiver from the original animasters and downloaded, installed and then learned Maya, all my anis were "store bought cookies" so you can certainly create nice anis using ones that already exist. I leave my anis "unlocked" so any ani I've ever created is fair game to use as a starting point. Also, until others get the exporter and archiver from me, store bought is the only option.
So here is how you build an ani from scratch. I have a folder on my hard drive (C:\utilities) and in that folder sits all the files I've already mentioned above. The EXEs, DLLs, CLPs, SCCs, TXTs, SKLs, BMPs and TGAs. There is also a file called build.bat that I'll go into later. There is another folder on my hard drive (C:\utilities\New Ani Files) where I create all the BMP textures for each golfer I create. For this example I'll use the folder for the recently created BSJCDJ ani (C:\utilities\New Ani Files\BSJCDJ).
I use my graphics software to get all my textures looking how I want them. In the case of the DJ ani, there were 198 textures that I had to prep. Now, I'll admit that I have a very good process for recycling textures now for faces, skin, eyes, shoes and pants. I even have a spreadsheet (don't judge me LOL) that has over 400 skin RGB sets so that I can very easily match the arm skin tone with the face skin tone. After I have the arm skin tones correct I just have to get the proper glove on the golfer and it's ready to go. After I have the textures all where I want them, I copy them to the (C:\utilities) folder where they will sit until I build the archive.
Next, I go into Maya and mold the body, hair, face, eyes, mouth, etc. to make the ani physically look how I want it to. That process is another post in itself so for now just know that I ended up with a file called DJ.MA. Once I have my textures finished and my Maya file ready, I'm ready to throw all the ingredients in the oven. By that I mean I setup my export.bat, build.bat and Script.txt files so that they build the golfer I intend to build. I already explained the script.txt file so for this example just assume that I've modified all those settings how I want for the DJ ani. Also remember that the script.txt file sits in the (C:\utilities) folder so it's ready to go now as well.
The Exporter
Now I have to setup my export.bat file so that the exporter can convert my .MA file to the SKL files and then copy them to my (C:\utilities) folder so they will be there when I launch the build.bat file that archives everything.
Below is the export.bat file that I run from a DOS command line that converts the .MA file to the SKL files and then copies those SKLs my (C:\utilities) folder.
echo -- Exporting Golfer--
c:\art\tools\exportSkeletonSA C:\Users\jclym\Documents\maya\projects\default\scenes\DJ.ma c:/utilities/golfer.skl character_model Player -a
cd..
cd..
cd c:\utilities
ren golfer.skl SERGIO_BOUND.skl
copy SERGIO_BOUND.skl SERGIO_LOW_BOUND.skl
The Archiver
I now have everything that will make up the ani in my (C:\utilities) folder so now all I need to do is build the archive using the archiver. My build.bat file is below so if you are familiar with reading scripts or batch files this should make sense to you. The end result of this build.bat is a BSJCDJ.L3 file in my C:\utilities folder. I copy that file to my links Polyani folder and then view it in the game.
Build.bat (ran from a DOS command from the c:\utilities directory)
ac2003.exe a *.clp BSJCDJ.l3
ac2003.exe a *.dll BSJCDJ.l3
ac2003.exe a nmake.exe BSJCDJ.l3
ac2003.exe a *.bmp BSJCDJ.l3
ac2003.exe a *.mak BSJCDJ.l3
ac2003.exe a *.scc BSJCDJ.l3
ac2003.exe a *.skl BSJCDJ.l3
ac2003.exe a *.txt BSJCDJ.l3
ac2003.exe a *.tga BSJCDJ.l3
A Baker You are NOT
As of now, I'm the only one with the exporter and archiver so building an ani from scratch isn't possible. Like I said though, if you want to take that plunge I really don't think the old animasters will have issues with me sharing those files at this stage of the game. Given the store bought cookies is the only option at this point, I'm now going to go over that method of creating an ani.
The most important thing to know with this method is that you are limited to the texture count that the original ani was created with. What that means is that if it has 6 pairs of pants you will only be able to have 6 pairs of pants. For that reason, I've deliberately been creating anis with tons of textures so that people that want to create new anis using my originals wouldn't be limited by texture count. Also, remember that you control how many of those textures the game sees using the Script.txt file. That means that if my original texture had 20 pairs of pants, but you only want the game to see 12 pairs of pants you can dictate that in the script.txt file.
The different golfer utility versions play a huge role in creating a new ani from an existing one. Specifically, you will need to be very comfortable with the GolferUtilityTXT.exe, GolferUtilityBMP.exe and GolferUtilitySKL.exe. You will essentially need to do 3 things to prepare to create your new ani. First, get all your textures together and named properly. You can only exchange textures using the golfer utility if the names are exact so double check your naming before you try to add your textures using the golfer utility. This step also includes any graphics software work that needs done on textures. Of course, you can also just grab textures already created and mix and match those as desired.
The second step is to extract the script.txt file, edit it to your liking and then re-add it to the .L3 file. This is where GolferUtilityTXT.exe comes in. Use my notes on the script.txt file to help you make the necessary changes to that file using notepad or any other TXT editor. Once you have the file how you want it, just open up the golfer utility and add it to the existing ani.
The third step is to determine what body/model type of ani you want your golfer to have. This is where my work to make unlimited options using the S01 model makes things super simple. Let's say you want your golfer to have a flat hat and wear pants. You simply grab my Bryson DeChambeau ani, extract the SKL files using the GolferUtilitySKL.exe and then add those to the .L3 file you are modifying using the golfer utility. You want an ani with shorts, use the BSJCMike.L3 file and grab those SKL files. You want to use an old animaster model? Same thing. Use the golfer utility to grab those SKL files and then add those files to the ani you are creating using the golfer utility.
Once you have the textures, script.txt and SKL files added to your ani, you should be able to view it in the game with your changes. Congrats, you've just created a new Links 2003 ani.
-
Big Sexy JC
- Posts: 307
- Joined: November 15th, 2022, 8:10 am
- Location: Indiana
Re: The Anatomy of an Ani
Topic 4 - Graphics Software and Golfer Utility
Without doing a full blown tutorial on either, I want to explain the role that the Golfer Utility and Graphics Software plays in the creation/modifying of an ani. I do have a confession to make though. I'll be 50 in May so I've now been in the IT industry for almost 31 years. I have a pretty good understanding of MOST things IT related. I understand hardware, desktop and server operating systems, networking (both wide area and local), servers, virtualization and I'm currently in my 13th year of application support.
That background gave me the confidence to tackle the anis, but I can't stress enough that I had almost zero knowledge of graphics design or graphics software when I started working on anis. I probably had less knowledge, and especially less confidence, when it came to coding or analyzing code. I did have a very good understanding of manipulating/writing/understanding .BAT (Batch files) from my early PC days of setting up config.sys and autoexec.bat files so that helped when I had to create the build.bat and export.bat files and I was very comfortable making sense of the script.txt file. Outside of some very simple HTML stuff from my days of creating/managing websites, I'm a complete idiot when it comes to programming languages.
On top of that, my art talent is embarrassingly awful. I mean beyond horrific. I would qualify for one of the worst art people on the planet. That's where my biggest struggles with the anis still lies. I just know I could make them better if I was better at art. It's the reason I wish someone with some art ability would hop into the mix because as good as my anis have become over time, someone with art ability would take them to a whole new level. The original animasters were artists and I still envy their art abilities.
On to the topic at hand. I'll start by saying you can make a really nice ani without ever opening a graphics design application. The golfer utility will allow you to extract every texture and SKL file so you can mix and match things to your desire using the already created textures. I'll get into the golfer utility in a bit. I've created some screenshots that I'll share regarding the process I use.
I always start each golfer with the face. After I have the face where I want it, I match the face skin tone with the arms and add the glove. I then grab the correct eye from my repository of eyes (yep, you read that correctly) and I'm now ready to start on the apparel.
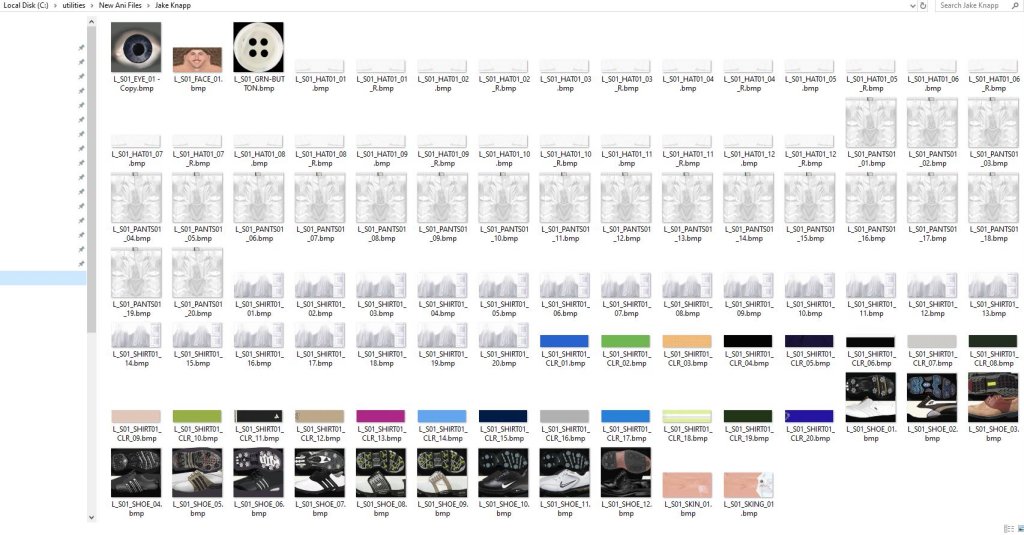
Below is a screenshot of what my current PGA Tour ani (Jake Knapp) folder looks like. You will notice a bunch of blank hats, shirts/collars and pants and some super old shoes. You will notice a completed face and arms and an eye.
The screenshot below shows the spreadsheet I use to make skin tone corrections. Each RGB has 256 colors on it's spectrum. Knowing that, I created a formula in Excel so that I know what adjustments need to me made to match skin tones of multiple sources. Getting the skin tone correct on the ani using an actual picture of the person I'm creating is the very first step I do in my graphics software.

After I get the face, skin (arms) and eye finished, I start to work on the apparel. Below is a screenshot of how I go about creating the shirts for Jake Knapp. I know that his apparel is Original Penguin so I go to their website and start grabbing the exact shirts that he wears in his tournaments based on pictures of him on Getty Images. I then create pants of the same color as the Getty Images pics to make the exact outfit. I do the same thing with his hats and shoes and then I use the Script.txt to setup the outfits that you see him wearing in the game.
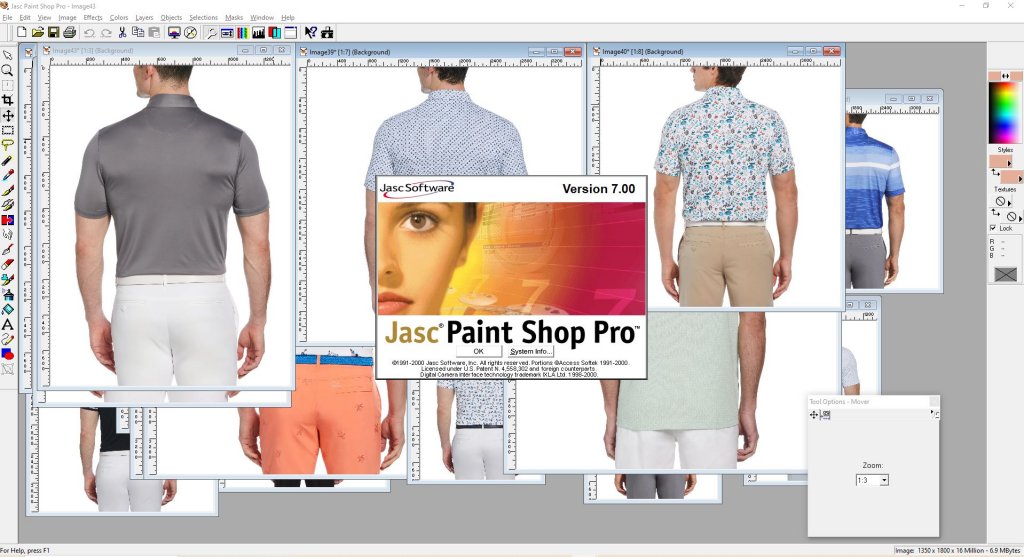
I use Jasc Paint Shop Pro 7.0 almost exclusively for my graphics design work on my anis. I'm not going to go into depth on how to use it because there are so many options out there and so many different things I do within PSP that a tutorial would take countless hours to create. I do have a copy of it that I would be willing to share so just PM me if you are interested.
After I have all the textures created I copy them to my utilities folder where they wait for me to build the final ani archive using my build.bat (explained in my previous topic/post).
Next I want to briefly explain the golfer utility. Now, in my opinion, the golfer utility is extremely easy to learn and use. It's very simple with limited functionality so it's perfect for an IT novice. As long as you know how to navigate to folders to open the golfers and to extract/add the textures you can use the utility.
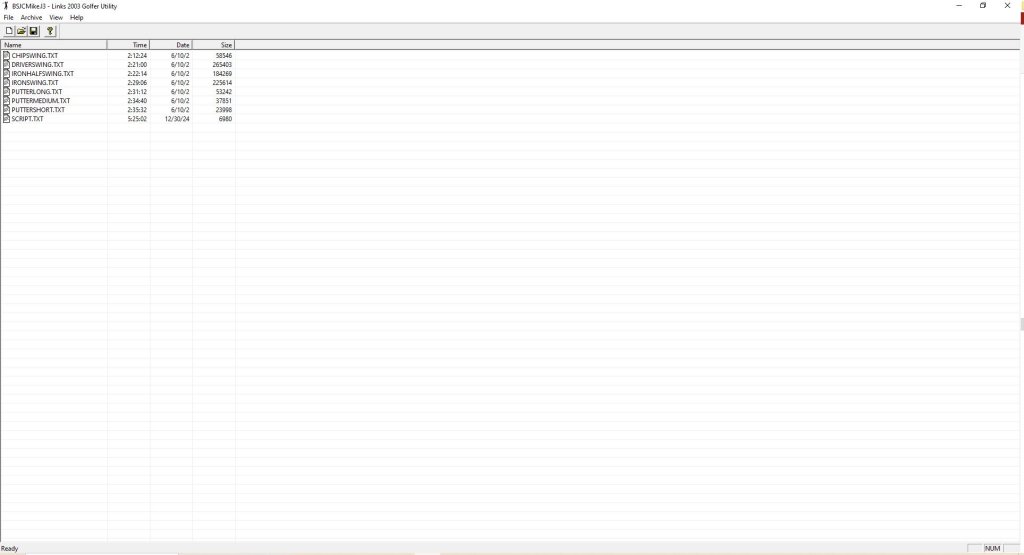
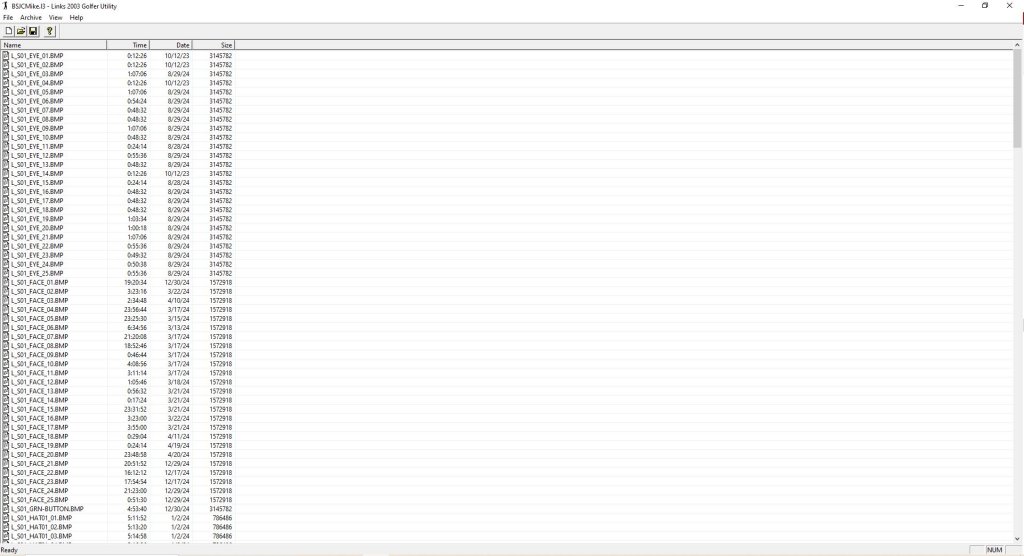
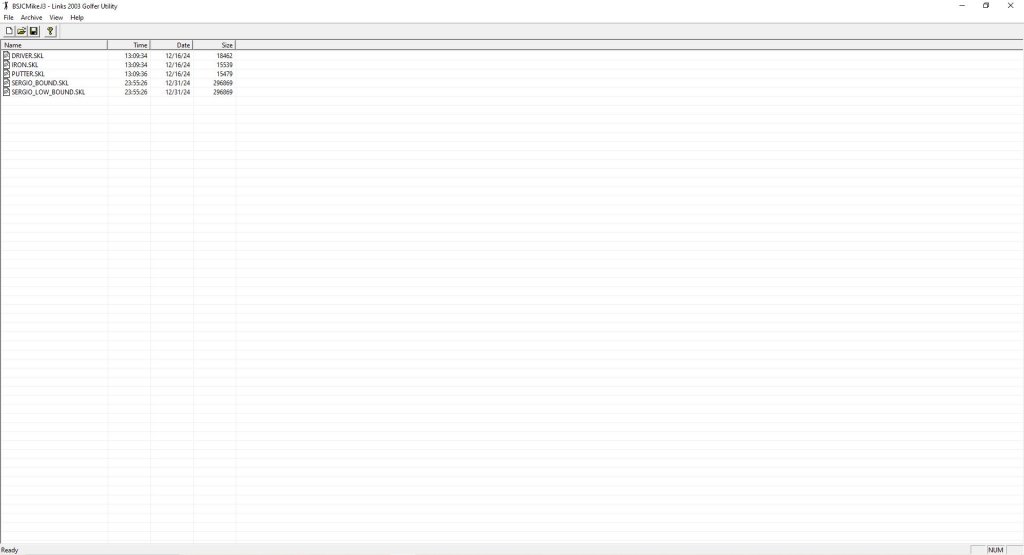
The 3 screenshots below are of the TXT, BMP and SKL versions of the golfer utility. I've opened the same ani (BSJCMike) with each of the different utilities. You can't open the same ani at the same time so you will need to open it with one of them and close the file before opening it with another one. To open the golfer simply navigate to the L3 file in your Polyani subfolder of your Links directory. Once you have the golfer opened you can either extract the files out to a location on your hard drive or add different files to the ani by selecting them from a location on your hard drive.
In order to create the different versions of the golfer utility, I had to look at the golferutility.exe file in a hex editor. The file isn't that large so I went through it in the hex editor line by line. Most of it is completely unrecognizable binary mumbo jumbo. However, the section below was mostly legible. I found the part that tells the utility what file type to look for and realized I could probably change that to anything so I made the change and tested it and it worked!!!!! The original version said .TGA instead of .BMP, but the snippet below is from the BMP version of the utility so that explains why .BMP is there.
You cannot modify Serjio Garcis, Davis Tomb, Jester Parnerik or Annita Sorenslam.) Golfer Utility Name= script.doc This file is an old version, can't deal with it, sorry. (Get an older version of archive if you need to open this file) Invalid Signature in file, this is not a valid file. Could not open file. Possible sharing violation. Error reading header. Error "%s" is not presest in archive, you can only replace files that are already there. You have already added a file with the name %s. All filenames must be unique The filename %s is too long. This program requires filenames to be less than 63 characters You have already added the maximum number of files that you can add in a single operation. Save the archive and then you can add more files. The filename %s is too long. Filenames must be less than 64 characters long You have already deleted the maximum number of files that you can delete in a single operation. Save the archive and then you can delete more files. You can't undelete that file because you have replaced it with another file with the same name. %d/%d/%d %d:%02d:%02d An error occured while writing to a temporary file. The original file is still in tact. Could not create temp file. ARC SCRIPT.doc \ Not enough memory to decompress %s Question The file %s already exists,
overwrite? The file %s already exists and
is read only, overwrite anyway? Software\Microsoft\Microsoft Games\Links 2003\GolferUtility Software\Microsoft\Microsoft Games\Links 2003\Paths PolyAni\ DefaultPath LastPath CArchiverDoc L3 Links 2003 Archives|*.l3|All Files (*.*)|*.*|| CArchiverView Size Date Time Name .bmp %d %d%% The file is read-only, you cannot make changes l3 BMP Files (*.bmp)|*.bmp|| This file is read only so you can't add files to it. Choose Directory to Extract *.* Choose Directory to Update From - RAMDISK - CDROM - - removable [%c:] A:\ %c:\ The selected directory does not exist. Would you like to create it? .. Output file write error Links 2003 Golfer Utility H¡C <¡C (¡C ¡C You can't save a golfer using the names of any of the pro golfers that come with Links The name can only contain letters and numbers You must enter a golfer name to continue ç ç ç CMainFrame \jA Ü3C .?AVCObject@@ Ü3C
So the next very reasonable question one could ask is why did I even look at the golfer utility in a hex editor in the first place? Well, before I opened the golfer utility, I opened an .L3 file in a hex editor. It was mostly hieroglyphics as well, but at the very beginning of the file (see below) I saw a reference to a list of files. I recognized some of the files from opening golfers in the golfer utility so I assumed the golfer contained more files than what I was seeing in the golfer utility. I then changed the golfer utility to account for each file type listed below and I was then able to see and ultimately extract all the files contained in an .L3 archive.
This was the day I realized some sort of archiver was used by MS/the animasters to create the anis and I didn't have that tool, but desperately wanted it. I also realized on that day that the configuration of the ani as it was setup by the original designer was not able to be modified and had to be kept as it was. That sucked, but using the script.txt file, I eventually worked around that limitation a little as well.
LSls7 G ‡ Üg ~INDEX~ CHIPADDRESS.CLP h CHIPADDRESSADJUSTGRIP.CLP ýº CHIPADDRESSBREATH.CLP † CHIPADDRESSRELAXINGBREATH.CLP (V CHIPFINISHBREATH.CLP —’ CHIPFINISHTOIRONNEUTRAL.CLP DÄ CHIPLOOKAT.CLP % CHIPPRACTICESWING.CLP «j CHIPROCKFEET.CLP 1/ CHIPSHORTBADPRACTICESWING.CLP èw CHIPSHORTBADSHAKEHEAD.CLP 5g CHIPSHORTCLOSEDIP.CLP =& CHIPSHORTGOODSMALLPUMP.CLP GË CHIPSHORTGOODWAVE.CLP Î_ CHIPSHORTINHOLEARMSUP.CLP Ã CHIPSHORTINHOLEPOINT.CLP qÕ CHIPSHORTOKCLEANCLUB.CLP f CHIPSHORTOKSPINCLUB.CLP Ï CHIPSHORTVERYBADHITGROUND.CLP ù› CHIPSHORTVERYBADKICKGROUND.CLP ¹]
CHIPSWING.CLP ïÿ
CHIPWAGGLE.CLP ¬Š CHIPWAGGLECOMBO.CLP øÒ DRIVERADDRESS.CLP W0 DRIVERADDRESSBREATH.CLP Ñ€ DRIVERADDRESSRELAXINGBREATH.CLP •¾ DRIVERCHECKGRIP.CLP «ñ DRIVERFINISHBREATH.CLP 1t
DRIVERFINISHTODRIVERNEUTRAL.CLP ̪
DRIVERLONGBADHANDONHIP.CLP Ë
DRIVERLONGBADSHAKEHEAD.CLP HB DRIVERLONGBADTAPCLUBHEAD.CLP Xú DRIVERLONGGOODDOUBLEPUMP.CLP ,ž DRIVERLONGGOODTHUMBSUP.CLP 0 DRIVERLONGINHOLEFISTPUMPLARGE.CLP õ› DRIVERLONGINHOLERAISEARMS.CLP KX DRIVERLONGOKPICKUPTEE.CLP ÷r DRIVERLONGOKSHIELDEYES.CLP A DRIVERLONGOKSPINCLUB.CLP Wê DRIVERLONGOKTAPGROUND.CLP $r DRIVERLONGVERYBADBREAKCLUB.CLP < DRIVERLONGVERYBADBREAKCLUBHEAD.CLP ÛÝ DRIVERLONGVERYBADFAKETHROWCLUB.CLP ZÆ DRIVERLONGVERYBADKICKGROUND.CLP ÈŸ DRIVERLOOKAT.CLP ç] DRIVERLOOKATCLUB.CLP ØŸ DRIVERNEUTRALBREATH.CLP G DRIVERNEUTRALTODRIVERSTRETCH.CLP y DRIVERPRACTICESWING.CLP xà DRIVERROCKFEET.CLP ¿‘ DRIVERSHIFTWEIGHT.CLP [Û DRIVERSHORTBADPRACTICE.CLP Ð` DRIVERSHORTBADSTOMPFOOT.CLP «Q DRIVERSHORTBADTAPDIVOT.CLP - DRIVERSHORTENGLISHFORWARDBODY.CLP ÷¾ DRIVERSHORTENGLISHLEFT.CLP ˆ· DRIVERSHORTENGLISHRIGHT.CLP øŠ DRIVERSHORTGOODFISTPUMPLARGE.CLP ŸW! DRIVERSHORTGOODFISTPUMPSMALL.CLP Pó! DRIVERSHORTGOODKISSCLUB.CLP Ö" DRIVERSHORTOKPICKUPTEE.CLP o.# DRIVERSHORTOKSHIELDEYES.CLP µê# DRIVERSHORTOKSPINCLUB.CLP ½% DRIVERSHORTVERYBADBREAKCLUBHEAD.CLP ˜v% DRIVERSHORTVERYBADBREAKCLUBKNEE.CLP ¶^& DRIVERSHORTVERYBADHITGROUND.CLP »'' DRIVERSTRETCHBACKBEHIND.CLP ÔÑ' DRIVERSTRETCHBACKBEND.CLP 'd( DRIVERSTRETCHBACKFRONT.CLP «ì( DRIVERSTRETCHBREATH.CLP <ˆ) DRIVERSTRETCHSIDE.CLP ½) DRIVERSTRETCHTODRIVERNEUTRAL.CLP Êa* DRIVERSWING.CLP ã* DRIVERSWING.TXT ‡, DRIVERTAPGROUND.CLP kZ. DRIVERTECHNICALPRACTICESWING.CLP áµ. DRIVERWAGGLE.CLP „l/ DRIVERWAGGLECOMBO.CLP @¤/ IRONADDRESS.CLP ßó/ IRONADDRESSBREATH.CLP +Z0 IRONFINISHBREATH.CLP W’0 IRONFINISHTOIRONNEUTRAL.CLP /Ì0 IRONHALFSWING.CLP #1 IRONHALFSWING.TXT ÃZ2 IRONLONGBADHANDONHIP.CLP )¢3 IRONLONGBADSHAKEHEAD.CLP ¿ª4 IRONLONGCLOSEDIPLOOKUP.CLP š5 IRONLONGENGLISHFORWARDBODY.CLP #E6 IRONLONGENGLISHLEFT.CLP Òò6 IRONLONGENGLISHRIGHT.CLP {©7 IRONLONGGOODSOFTFISTPUMP.CLP KO8 IRONLONGGOODWAVE.CLP EÝ8 IRONLONGINHOLEARMSUP.CLP ’V9 IRONLONGINHOLEFISTPUMPLARGE.CLP $\: IRONLONGOKCLEANCLUB.CLP üà: IRONLONGOKTAPGROUND.CLP v™; IRONLONGVERYBADHITCLUB.CLP É%< IRONLONGVERYBADTHROWCLUB.CLP …ù< IRONLOOKAT.CLP Æ= IRONLOOKATCLUB.CLP ·> IRONNEUTRALBREATH.CLP À> IRONNEUTRALTOIRONSTRETCH.CLP þ> IRONROCKFEET.CLP U? IRONSHORTBADPRACTICE.CLP ì†? IRONSHORTBADTAPDIVOT.CLP Çm@ IRONSHORTENGLISHLEFT.CLP A IRONSHORTENGLISHRIGHT.CLP ôÂA IRONSHORTGOODCAP.CLP ¿lB IRONSHORTGOODDOUBLEFISTPUMP.CLP ÈC IRONSHORTGOODFISTPUMPLARGE.CLP ö›C IRONSHORTINHOLEPUMP.CLP M7D IRONSHORTINHOLERAISEARMS.CLP øD IRONSHORTOKCLEANCLUB.CLP îÚE IRONSHORTOKSPINCLUB.CLP ”¦F IRONSHORTVERYBADBREAKCLUBHEAD.CLP #6G IRONSHORTVERYBADBREAKCLUBKNEE.CLP ÌG IRONSHORTVERYBADHITGROUND.CLP %€H IRONSTRETCHBACKBEHIND.CLP ¦I IRONSTRETCHBACKFRONT.CLP ÌÜI IRONSTRETCHBREATH.CLP ¾¤J IRONSTRETCHSIDE.CLP šîJ IRONSTRETCHTOIRONNEUTRAL.CLP kK IRONSWING.CLP ¡L IRONSWING.TXT „M IRONTAPGROUND.CLP IO IRONTECHNICALPRACTICESWING.CLP v O IRONWAGGLE.CLP .ÙP IRONWAGGLECOMBO.CLP P.Q MAKEFILE.MAK ašQ MSSCCPRJ.SCC °Q NMAKE.EXE ‘žQ PUTTERADDRESS.CLP é_R PUTTERADDRESSBREATH.CLP ¬¯R PUTTERBRUSHGROUND.CLP S PUTTERCLEANCLUBPANTS.CLP ÅwS PUTTERFINISHBREATH.CLP ‡T PUTTERFINISHTOPUTTERNEUTRAL.CLP ¼MT PUTTERFIXDIVOT.CLP +¹T PUTTERLONG.CLP tU PUTTERLONG.TXT vV PUTTERLONGBADFOREHEAD.CLP ?V PUTTERLONGBADHANGHEAD.CLP tþV PUTTERLONGBADTURNAWAY.CLP ]%X PUTTERLONGCLOSEDIP.CLP -üX PUTTERLONGCLOSEDIPFOREHEAD.CLP •™Y PUTTERLONGCLOSEDIPLOOKUP.CLP fgZ PUTTERLONGENGLISHBODY.CLP Î[ PUTTERLONGFOLLOWTHROUGH.CLP Å[ PUTTERLONGGOODCAP.CLP ü\ PUTTERLONGGOODSOFTFISTPUMP.CLP …\ PUTTERLONGGOODWAVE.CLP •] PUTTERLONGINHOLEARMSUP.CLP ] PUTTERLONGINHOLEPOINT.CLP ²…^ PUTTERLONGINHOLEPUNCH.CLP ?1_ PUTTERLONGVERYBADBREAKCLUB.CLP p ` PUTTERLONGVERYBADHITCLUB.CLP ^a PUTTERLONGVERYBADTHROWCLUB.CLP ‹äa PUTTERLOOKAT.CLP WÉb PUTTERMEDIUM.CLP ãc PUTTERMEDIUM.TXT Ùyc PUTTERMEDIUMFOLLOWTHROUGH.CLP ›c PUTTERNEUTRALBREATH.CLP -×c PUTTERPRACTICESWING.CLP d PUTTERROCKFEET.CLP ·d PUTTERSHAKEARM.CLP Ôõd PUTTERSHORT.CLP —?e PUTTERSHORT.TXT é e PUTTERSHORTBADCHECKSTROKE.CLP ·Ãe PUTTERSHORTBADFOREHEAD.CLP ƒf PUTTERSHORTBADHANGHEAD.CLP ·:g PUTTERSHORTBADSHAKEHEAD.CLP @/h PUTTERSHORTBADTURNAWAY.CLP êh PUTTERSHORTCLOSEDIP.CLP ç¨i PUTTERSHORTCLOSEDIPLOOKUP.CLP žVj PUTTERSHORTFOLLOWTHROUGH.CLP Í.k PUTTERSHORTGOODSOFTFISTPUMP.CLP @ik PUTTERSHORTGOODWAVE.CLP  l PUTTERSHORTINHOLEHARDPUMP.CLP ¶l PUTTERSHORTINHOLEPOINT.CLP vm PUTTERSHORTINHOLERAISEANDPUMP.CLP Wšm PUTTERSHORTVERYBADHANDSONHEAD.CLP JPn PUTTERSHORTVERYBADHANDSONKNEES.CLP #o PUTTERSHORTVERYBADLOOKUP.CLP †¥p PUTTERTAPGROUND.CLP ¯q PUTTERWAGGLECOMBO.CLP ¼r VSSVER.SCC 0Jr ZOMBIE.CLP ¦Jr SERGIO_BOUND.SKL er SERGIO_LOW_BOUND.SKL m9u L_S01_EYE_01.BMP Ì
x L_S01_EYE_02.BMP /€ L_S01_EYE_03.BMP x¢ L_S01_EYE_04.BMP ýo· L_S01_EYE_05.BMP ÉÌ L_S01_EYE_06.BMP aqÚ L_S01_EYE_07.BMP ê¾í L_S01_EYE_08.BMP sL_S01_EYE_09.BMP ZL_S01_EYE_10.BMP ±“+L_S01_FACE_05.BMP Äì@L_S01_FACE_06.BMP é<VL_S01_FACE_07.BMP p™mL_S01_FACE_08.BMP ©4ƒL_S01_FACE_09.BMP ÑOšL_S01_FACE_10.BMP —¯L_S01_GRN-BUTTON.BMP ðÆL_S01_HAT01_01.BMP {ÃàL_S01_HAT01_01_R.BMP ùçL_S01_HAT01_02.BMP píL_S01_HAT01_02_R.BMP CñL_S01_HAT01_03.BMP žõL_S01_HAT01_03_R.BMP êZûL_S01_HAT01_04.BMP Z¯L_S01_HAT01_04_R.BMP 9(
L_S01_HAT01_05.BMP ûžL_S01_HAT01_05_R.BMP JL_S01_HAT01_06.BMP Ì÷L_S01_HAT01_06_R.BMP ©L_S01_HAT01_07.BMP G L_S01_HAT01_07_R.BMP ï3#L_S01_HAT01_08.BMP |&L_S01_HAT01_08_R.BMP t²*L_S01_HAT01_09.BMP NN/L_S01_HAT01_09_R.BMP Zÿ6L_S01_HAT01_10.BMP 9®>L_S01_HAT01_10_R.BMP ÙuBL_S01_HAT01_11.BMP V<FL_S01_HAT01_11_R.BMP øLL_S01_HAT01_12.BMP Þ²SL_S01_HAT01_12_R.BMP ¹XL_S01_SHIRT01_01.BMP òh\L_S01_SHIRT01_02.BMP üŠkL_S01_SHIRT01_03.BMP _áxL_S01_SHIRT01_04.BMP ÌáL_S01_SHIRT01_05.BMP ‚{žL_S01_SHIRT01_06.BMP
¼©L_S01_SHIRT01_07.BMP 7Z±L_S01_SHIRT01_08.BMP EÁL_S01_SHIRT01_09.BMP 4ÇL_S01_SHIRT01_10.BMP <ÒÔL_S01_SHIRT01_11.BMP XâL_S01_SHIRT01_12.BMP ŸiëL_S01_SHIRT01_13.BMP
“ôL_S01_SHIRT01_14.BMP ÊŠýL_S01_SHIRT01_15.BMP üËL_S01_SHIRT01_16.BMP 5HL_S01_SHIRT01_17.BMP C0%L_S01_SHIRT01_18.BMP ÷U2L_S01_SHIRT01_19.BMP ¶ê>L_S01_SHIRT01_20.BMP 0‘IL_S01_SHIRT01_CLR_01.BMP $,TL_S01_SHIRT01_CLR_02.BMP æ8UL_S01_SHIRT01_CLR_03.BMP ÕVL_S01_SHIRT01_CLR_04.BMP ÿ:bL_S01_SHIRT01_CLR_05.BMP a¨bL_S01_SHIRT01_CLR_06.BMP UdeL_S01_SHIRT01_CLR_07.BMP lzfL_S01_SHIRT01_CLR_08.BMP MhL_S01_SHIRT01_CLR_09.BMP `<iL_S01_SHIRT01_CLR_10.BMP jL_S01_SHIRT01_CLR_11.BMP 1ÎjL_S01_SHIRT01_CLR_12.BMP ÚÓmL_S01_SHIRT01_CLR_13.BMP +ÊoL_S01_SHIRT01_CLR_14.BMP ‚pL_S01_SHIRT01_CLR_15.BMP óƒqL_S01_SHIRT01_CLR_16.BMP !nrL_S01_SHIRT01_CLR_17.BMP ŽsL_S01_SHIRT01_CLR_18.BMP }×sL_S01_SHIRT01_CLR_19.BMP ]9vL_S01_SHIRT01_CLR_20.BMP ÔÏvL_S01_SHOE_01.BMP ÆxL_S01_SHOE_02.BMP CL_S01_SHOE_03.BMP ç‹L_S01_SHOE_04.BMP 8eÓL_S01_SHOE_05.BMP x¹ãL_S01_SHOE_06.BMP ëL_S01_SHOE_07.BMP \ÚL_S01_SHOE_08.BMP øù1L_S01_SHOE_09.BMP ÚQL_S01_SHOE_10.BMP 5.qL_S01_SHOE_11.BMP âìL_S01_SHOE_12.BMP Z6«L_S01_SKIN_01.BMP +ÅÃL_S01_SKIN_02.BMP ‡úÑL_S01_SKIN_03.BMP øKàL_S01_SKIN_04.BMP TîL_S01_SKIN_05.BMP ÅÒüL_S01_SKIN_06.BMP !L_S01_SKIN_07.BMP .NL_S01_SKIN_08.BMP 7%L_S01_SKIN_09.BMP Œ#3L_S01_SKIN_10.BMP lAL_S01_SKING_01.BMP ‡½OL_S01_SKING_02.BMP 5«_L_S01_SKING_03.BMP °ŸmL_S01_SKING_04.BMP ^}L_S01_SKING_05.BMP Ù‹L_S01_SKING_06.BMP ‡o›L_S01_SKING_07.BMP |©L_S01_SKING_08.BMP ‹ì´L_S01_SKING_09.BMP ¶´ÂL_S01_SKING_10.BMP ¼SÐSCRIPT.TXT 7HÞL_S01_PANTS01_01.BMP ÑUÞL_S01_PANTS01_02.BMP ¾.êL_S01_PANTS01_03.BMP crL_S01_PANTS01_04.BMP Ë!L_S01_PANTS01_05.BMP äDL_S01_PANTS01_06.BMP Ê"bL_S01_PANTS01_07.BMP ŠwL_S01_PANTS01_08.BMP Cx—L_S01_PANTS01_09.BMP Øu¾L_S01_PANTS01_10.BMP EvîL_S01_PANTS01_11.BMP ù†L_S01_PANTS01_12.BMP pí@L_S01_PANTS01_13.BMP $vfL_S01_PANTS01_14.BMP •£„L_S01_PANTS01_15.BMP r©¦L_S01_PANTS01_16.BMP DdÊL_S01_PANTS01_17.BMP ÕuóL_S01_PANTS01_18.BMP L_S01_PANTS01_19.BMP ~²L_S01_PANTS01_20.BMP ƒŸ1L_S01_FACE_01.BMP ЩCL_S01_FACE_02.BMP qXL_S01_FACE_03.BMP ajL_S01_FACE_04.BMP
As I wrap this post up, I wanted to explain when/why I use graphics software and what software I used and how it fit into my process. I'm really trying to not only explain the technical info on the ani, but the process I use to create them. I also wanted to explain how the different versions of the golfer utility came to be. I cant emphasize enough that I didn't know a damn thing about any of this stuff at the beginning. I'm stubborn as hell and had a good why (we needed more anis) and had just enough IT knowledge to connect the dots along the way. At the end of the day, getting in contact with 3 very crucial original MS/Animaster folks put the finishing touches on my journey.
Without doing a full blown tutorial on either, I want to explain the role that the Golfer Utility and Graphics Software plays in the creation/modifying of an ani. I do have a confession to make though. I'll be 50 in May so I've now been in the IT industry for almost 31 years. I have a pretty good understanding of MOST things IT related. I understand hardware, desktop and server operating systems, networking (both wide area and local), servers, virtualization and I'm currently in my 13th year of application support.
That background gave me the confidence to tackle the anis, but I can't stress enough that I had almost zero knowledge of graphics design or graphics software when I started working on anis. I probably had less knowledge, and especially less confidence, when it came to coding or analyzing code. I did have a very good understanding of manipulating/writing/understanding .BAT (Batch files) from my early PC days of setting up config.sys and autoexec.bat files so that helped when I had to create the build.bat and export.bat files and I was very comfortable making sense of the script.txt file. Outside of some very simple HTML stuff from my days of creating/managing websites, I'm a complete idiot when it comes to programming languages.
On top of that, my art talent is embarrassingly awful. I mean beyond horrific. I would qualify for one of the worst art people on the planet. That's where my biggest struggles with the anis still lies. I just know I could make them better if I was better at art. It's the reason I wish someone with some art ability would hop into the mix because as good as my anis have become over time, someone with art ability would take them to a whole new level. The original animasters were artists and I still envy their art abilities.
On to the topic at hand. I'll start by saying you can make a really nice ani without ever opening a graphics design application. The golfer utility will allow you to extract every texture and SKL file so you can mix and match things to your desire using the already created textures. I'll get into the golfer utility in a bit. I've created some screenshots that I'll share regarding the process I use.
I always start each golfer with the face. After I have the face where I want it, I match the face skin tone with the arms and add the glove. I then grab the correct eye from my repository of eyes (yep, you read that correctly) and I'm now ready to start on the apparel.
Below is a screenshot of what my current PGA Tour ani (Jake Knapp) folder looks like. You will notice a bunch of blank hats, shirts/collars and pants and some super old shoes. You will notice a completed face and arms and an eye.
The screenshot below shows the spreadsheet I use to make skin tone corrections. Each RGB has 256 colors on it's spectrum. Knowing that, I created a formula in Excel so that I know what adjustments need to me made to match skin tones of multiple sources. Getting the skin tone correct on the ani using an actual picture of the person I'm creating is the very first step I do in my graphics software.
After I get the face, skin (arms) and eye finished, I start to work on the apparel. Below is a screenshot of how I go about creating the shirts for Jake Knapp. I know that his apparel is Original Penguin so I go to their website and start grabbing the exact shirts that he wears in his tournaments based on pictures of him on Getty Images. I then create pants of the same color as the Getty Images pics to make the exact outfit. I do the same thing with his hats and shoes and then I use the Script.txt to setup the outfits that you see him wearing in the game.
I use Jasc Paint Shop Pro 7.0 almost exclusively for my graphics design work on my anis. I'm not going to go into depth on how to use it because there are so many options out there and so many different things I do within PSP that a tutorial would take countless hours to create. I do have a copy of it that I would be willing to share so just PM me if you are interested.
After I have all the textures created I copy them to my utilities folder where they wait for me to build the final ani archive using my build.bat (explained in my previous topic/post).
Next I want to briefly explain the golfer utility. Now, in my opinion, the golfer utility is extremely easy to learn and use. It's very simple with limited functionality so it's perfect for an IT novice. As long as you know how to navigate to folders to open the golfers and to extract/add the textures you can use the utility.
The 3 screenshots below are of the TXT, BMP and SKL versions of the golfer utility. I've opened the same ani (BSJCMike) with each of the different utilities. You can't open the same ani at the same time so you will need to open it with one of them and close the file before opening it with another one. To open the golfer simply navigate to the L3 file in your Polyani subfolder of your Links directory. Once you have the golfer opened you can either extract the files out to a location on your hard drive or add different files to the ani by selecting them from a location on your hard drive.
In order to create the different versions of the golfer utility, I had to look at the golferutility.exe file in a hex editor. The file isn't that large so I went through it in the hex editor line by line. Most of it is completely unrecognizable binary mumbo jumbo. However, the section below was mostly legible. I found the part that tells the utility what file type to look for and realized I could probably change that to anything so I made the change and tested it and it worked!!!!! The original version said .TGA instead of .BMP, but the snippet below is from the BMP version of the utility so that explains why .BMP is there.
You cannot modify Serjio Garcis, Davis Tomb, Jester Parnerik or Annita Sorenslam.) Golfer Utility Name= script.doc This file is an old version, can't deal with it, sorry. (Get an older version of archive if you need to open this file) Invalid Signature in file, this is not a valid file. Could not open file. Possible sharing violation. Error reading header. Error "%s" is not presest in archive, you can only replace files that are already there. You have already added a file with the name %s. All filenames must be unique The filename %s is too long. This program requires filenames to be less than 63 characters You have already added the maximum number of files that you can add in a single operation. Save the archive and then you can add more files. The filename %s is too long. Filenames must be less than 64 characters long You have already deleted the maximum number of files that you can delete in a single operation. Save the archive and then you can delete more files. You can't undelete that file because you have replaced it with another file with the same name. %d/%d/%d %d:%02d:%02d An error occured while writing to a temporary file. The original file is still in tact. Could not create temp file. ARC SCRIPT.doc \ Not enough memory to decompress %s Question The file %s already exists,
overwrite? The file %s already exists and
is read only, overwrite anyway? Software\Microsoft\Microsoft Games\Links 2003\GolferUtility Software\Microsoft\Microsoft Games\Links 2003\Paths PolyAni\ DefaultPath LastPath CArchiverDoc L3 Links 2003 Archives|*.l3|All Files (*.*)|*.*|| CArchiverView Size Date Time Name .bmp %d %d%% The file is read-only, you cannot make changes l3 BMP Files (*.bmp)|*.bmp|| This file is read only so you can't add files to it. Choose Directory to Extract *.* Choose Directory to Update From - RAMDISK - CDROM - - removable [%c:] A:\ %c:\ The selected directory does not exist. Would you like to create it? .. Output file write error Links 2003 Golfer Utility H¡C <¡C (¡C ¡C You can't save a golfer using the names of any of the pro golfers that come with Links The name can only contain letters and numbers You must enter a golfer name to continue ç ç ç CMainFrame \jA Ü3C .?AVCObject@@ Ü3C
So the next very reasonable question one could ask is why did I even look at the golfer utility in a hex editor in the first place? Well, before I opened the golfer utility, I opened an .L3 file in a hex editor. It was mostly hieroglyphics as well, but at the very beginning of the file (see below) I saw a reference to a list of files. I recognized some of the files from opening golfers in the golfer utility so I assumed the golfer contained more files than what I was seeing in the golfer utility. I then changed the golfer utility to account for each file type listed below and I was then able to see and ultimately extract all the files contained in an .L3 archive.
This was the day I realized some sort of archiver was used by MS/the animasters to create the anis and I didn't have that tool, but desperately wanted it. I also realized on that day that the configuration of the ani as it was setup by the original designer was not able to be modified and had to be kept as it was. That sucked, but using the script.txt file, I eventually worked around that limitation a little as well.
LSls7 G ‡ Üg ~INDEX~ CHIPADDRESS.CLP h CHIPADDRESSADJUSTGRIP.CLP ýº CHIPADDRESSBREATH.CLP † CHIPADDRESSRELAXINGBREATH.CLP (V CHIPFINISHBREATH.CLP —’ CHIPFINISHTOIRONNEUTRAL.CLP DÄ CHIPLOOKAT.CLP % CHIPPRACTICESWING.CLP «j CHIPROCKFEET.CLP 1/ CHIPSHORTBADPRACTICESWING.CLP èw CHIPSHORTBADSHAKEHEAD.CLP 5g CHIPSHORTCLOSEDIP.CLP =& CHIPSHORTGOODSMALLPUMP.CLP GË CHIPSHORTGOODWAVE.CLP Î_ CHIPSHORTINHOLEARMSUP.CLP Ã CHIPSHORTINHOLEPOINT.CLP qÕ CHIPSHORTOKCLEANCLUB.CLP f CHIPSHORTOKSPINCLUB.CLP Ï CHIPSHORTVERYBADHITGROUND.CLP ù› CHIPSHORTVERYBADKICKGROUND.CLP ¹]
CHIPSWING.CLP ïÿ
CHIPWAGGLE.CLP ¬Š CHIPWAGGLECOMBO.CLP øÒ DRIVERADDRESS.CLP W0 DRIVERADDRESSBREATH.CLP Ñ€ DRIVERADDRESSRELAXINGBREATH.CLP •¾ DRIVERCHECKGRIP.CLP «ñ DRIVERFINISHBREATH.CLP 1t
DRIVERFINISHTODRIVERNEUTRAL.CLP ̪
DRIVERLONGBADHANDONHIP.CLP Ë
DRIVERLONGBADSHAKEHEAD.CLP HB DRIVERLONGBADTAPCLUBHEAD.CLP Xú DRIVERLONGGOODDOUBLEPUMP.CLP ,ž DRIVERLONGGOODTHUMBSUP.CLP 0 DRIVERLONGINHOLEFISTPUMPLARGE.CLP õ› DRIVERLONGINHOLERAISEARMS.CLP KX DRIVERLONGOKPICKUPTEE.CLP ÷r DRIVERLONGOKSHIELDEYES.CLP A DRIVERLONGOKSPINCLUB.CLP Wê DRIVERLONGOKTAPGROUND.CLP $r DRIVERLONGVERYBADBREAKCLUB.CLP < DRIVERLONGVERYBADBREAKCLUBHEAD.CLP ÛÝ DRIVERLONGVERYBADFAKETHROWCLUB.CLP ZÆ DRIVERLONGVERYBADKICKGROUND.CLP ÈŸ DRIVERLOOKAT.CLP ç] DRIVERLOOKATCLUB.CLP ØŸ DRIVERNEUTRALBREATH.CLP G DRIVERNEUTRALTODRIVERSTRETCH.CLP y DRIVERPRACTICESWING.CLP xà DRIVERROCKFEET.CLP ¿‘ DRIVERSHIFTWEIGHT.CLP [Û DRIVERSHORTBADPRACTICE.CLP Ð` DRIVERSHORTBADSTOMPFOOT.CLP «Q DRIVERSHORTBADTAPDIVOT.CLP - DRIVERSHORTENGLISHFORWARDBODY.CLP ÷¾ DRIVERSHORTENGLISHLEFT.CLP ˆ· DRIVERSHORTENGLISHRIGHT.CLP øŠ DRIVERSHORTGOODFISTPUMPLARGE.CLP ŸW! DRIVERSHORTGOODFISTPUMPSMALL.CLP Pó! DRIVERSHORTGOODKISSCLUB.CLP Ö" DRIVERSHORTOKPICKUPTEE.CLP o.# DRIVERSHORTOKSHIELDEYES.CLP µê# DRIVERSHORTOKSPINCLUB.CLP ½% DRIVERSHORTVERYBADBREAKCLUBHEAD.CLP ˜v% DRIVERSHORTVERYBADBREAKCLUBKNEE.CLP ¶^& DRIVERSHORTVERYBADHITGROUND.CLP »'' DRIVERSTRETCHBACKBEHIND.CLP ÔÑ' DRIVERSTRETCHBACKBEND.CLP 'd( DRIVERSTRETCHBACKFRONT.CLP «ì( DRIVERSTRETCHBREATH.CLP <ˆ) DRIVERSTRETCHSIDE.CLP ½) DRIVERSTRETCHTODRIVERNEUTRAL.CLP Êa* DRIVERSWING.CLP ã* DRIVERSWING.TXT ‡, DRIVERTAPGROUND.CLP kZ. DRIVERTECHNICALPRACTICESWING.CLP áµ. DRIVERWAGGLE.CLP „l/ DRIVERWAGGLECOMBO.CLP @¤/ IRONADDRESS.CLP ßó/ IRONADDRESSBREATH.CLP +Z0 IRONFINISHBREATH.CLP W’0 IRONFINISHTOIRONNEUTRAL.CLP /Ì0 IRONHALFSWING.CLP #1 IRONHALFSWING.TXT ÃZ2 IRONLONGBADHANDONHIP.CLP )¢3 IRONLONGBADSHAKEHEAD.CLP ¿ª4 IRONLONGCLOSEDIPLOOKUP.CLP š5 IRONLONGENGLISHFORWARDBODY.CLP #E6 IRONLONGENGLISHLEFT.CLP Òò6 IRONLONGENGLISHRIGHT.CLP {©7 IRONLONGGOODSOFTFISTPUMP.CLP KO8 IRONLONGGOODWAVE.CLP EÝ8 IRONLONGINHOLEARMSUP.CLP ’V9 IRONLONGINHOLEFISTPUMPLARGE.CLP $\: IRONLONGOKCLEANCLUB.CLP üà: IRONLONGOKTAPGROUND.CLP v™; IRONLONGVERYBADHITCLUB.CLP É%< IRONLONGVERYBADTHROWCLUB.CLP …ù< IRONLOOKAT.CLP Æ= IRONLOOKATCLUB.CLP ·> IRONNEUTRALBREATH.CLP À> IRONNEUTRALTOIRONSTRETCH.CLP þ> IRONROCKFEET.CLP U? IRONSHORTBADPRACTICE.CLP ì†? IRONSHORTBADTAPDIVOT.CLP Çm@ IRONSHORTENGLISHLEFT.CLP A IRONSHORTENGLISHRIGHT.CLP ôÂA IRONSHORTGOODCAP.CLP ¿lB IRONSHORTGOODDOUBLEFISTPUMP.CLP ÈC IRONSHORTGOODFISTPUMPLARGE.CLP ö›C IRONSHORTINHOLEPUMP.CLP M7D IRONSHORTINHOLERAISEARMS.CLP øD IRONSHORTOKCLEANCLUB.CLP îÚE IRONSHORTOKSPINCLUB.CLP ”¦F IRONSHORTVERYBADBREAKCLUBHEAD.CLP #6G IRONSHORTVERYBADBREAKCLUBKNEE.CLP ÌG IRONSHORTVERYBADHITGROUND.CLP %€H IRONSTRETCHBACKBEHIND.CLP ¦I IRONSTRETCHBACKFRONT.CLP ÌÜI IRONSTRETCHBREATH.CLP ¾¤J IRONSTRETCHSIDE.CLP šîJ IRONSTRETCHTOIRONNEUTRAL.CLP kK IRONSWING.CLP ¡L IRONSWING.TXT „M IRONTAPGROUND.CLP IO IRONTECHNICALPRACTICESWING.CLP v O IRONWAGGLE.CLP .ÙP IRONWAGGLECOMBO.CLP P.Q MAKEFILE.MAK ašQ MSSCCPRJ.SCC °Q NMAKE.EXE ‘žQ PUTTERADDRESS.CLP é_R PUTTERADDRESSBREATH.CLP ¬¯R PUTTERBRUSHGROUND.CLP S PUTTERCLEANCLUBPANTS.CLP ÅwS PUTTERFINISHBREATH.CLP ‡T PUTTERFINISHTOPUTTERNEUTRAL.CLP ¼MT PUTTERFIXDIVOT.CLP +¹T PUTTERLONG.CLP tU PUTTERLONG.TXT vV PUTTERLONGBADFOREHEAD.CLP ?V PUTTERLONGBADHANGHEAD.CLP tþV PUTTERLONGBADTURNAWAY.CLP ]%X PUTTERLONGCLOSEDIP.CLP -üX PUTTERLONGCLOSEDIPFOREHEAD.CLP •™Y PUTTERLONGCLOSEDIPLOOKUP.CLP fgZ PUTTERLONGENGLISHBODY.CLP Î[ PUTTERLONGFOLLOWTHROUGH.CLP Å[ PUTTERLONGGOODCAP.CLP ü\ PUTTERLONGGOODSOFTFISTPUMP.CLP …\ PUTTERLONGGOODWAVE.CLP •] PUTTERLONGINHOLEARMSUP.CLP ] PUTTERLONGINHOLEPOINT.CLP ²…^ PUTTERLONGINHOLEPUNCH.CLP ?1_ PUTTERLONGVERYBADBREAKCLUB.CLP p ` PUTTERLONGVERYBADHITCLUB.CLP ^a PUTTERLONGVERYBADTHROWCLUB.CLP ‹äa PUTTERLOOKAT.CLP WÉb PUTTERMEDIUM.CLP ãc PUTTERMEDIUM.TXT Ùyc PUTTERMEDIUMFOLLOWTHROUGH.CLP ›c PUTTERNEUTRALBREATH.CLP -×c PUTTERPRACTICESWING.CLP d PUTTERROCKFEET.CLP ·d PUTTERSHAKEARM.CLP Ôõd PUTTERSHORT.CLP —?e PUTTERSHORT.TXT é e PUTTERSHORTBADCHECKSTROKE.CLP ·Ãe PUTTERSHORTBADFOREHEAD.CLP ƒf PUTTERSHORTBADHANGHEAD.CLP ·:g PUTTERSHORTBADSHAKEHEAD.CLP @/h PUTTERSHORTBADTURNAWAY.CLP êh PUTTERSHORTCLOSEDIP.CLP ç¨i PUTTERSHORTCLOSEDIPLOOKUP.CLP žVj PUTTERSHORTFOLLOWTHROUGH.CLP Í.k PUTTERSHORTGOODSOFTFISTPUMP.CLP @ik PUTTERSHORTGOODWAVE.CLP  l PUTTERSHORTINHOLEHARDPUMP.CLP ¶l PUTTERSHORTINHOLEPOINT.CLP vm PUTTERSHORTINHOLERAISEANDPUMP.CLP Wšm PUTTERSHORTVERYBADHANDSONHEAD.CLP JPn PUTTERSHORTVERYBADHANDSONKNEES.CLP #o PUTTERSHORTVERYBADLOOKUP.CLP †¥p PUTTERTAPGROUND.CLP ¯q PUTTERWAGGLECOMBO.CLP ¼r VSSVER.SCC 0Jr ZOMBIE.CLP ¦Jr SERGIO_BOUND.SKL er SERGIO_LOW_BOUND.SKL m9u L_S01_EYE_01.BMP Ì
x L_S01_EYE_02.BMP /€ L_S01_EYE_03.BMP x¢ L_S01_EYE_04.BMP ýo· L_S01_EYE_05.BMP ÉÌ L_S01_EYE_06.BMP aqÚ L_S01_EYE_07.BMP ê¾í L_S01_EYE_08.BMP sL_S01_EYE_09.BMP ZL_S01_EYE_10.BMP ±“+L_S01_FACE_05.BMP Äì@L_S01_FACE_06.BMP é<VL_S01_FACE_07.BMP p™mL_S01_FACE_08.BMP ©4ƒL_S01_FACE_09.BMP ÑOšL_S01_FACE_10.BMP —¯L_S01_GRN-BUTTON.BMP ðÆL_S01_HAT01_01.BMP {ÃàL_S01_HAT01_01_R.BMP ùçL_S01_HAT01_02.BMP píL_S01_HAT01_02_R.BMP CñL_S01_HAT01_03.BMP žõL_S01_HAT01_03_R.BMP êZûL_S01_HAT01_04.BMP Z¯L_S01_HAT01_04_R.BMP 9(
L_S01_HAT01_05.BMP ûžL_S01_HAT01_05_R.BMP JL_S01_HAT01_06.BMP Ì÷L_S01_HAT01_06_R.BMP ©L_S01_HAT01_07.BMP G L_S01_HAT01_07_R.BMP ï3#L_S01_HAT01_08.BMP |&L_S01_HAT01_08_R.BMP t²*L_S01_HAT01_09.BMP NN/L_S01_HAT01_09_R.BMP Zÿ6L_S01_HAT01_10.BMP 9®>L_S01_HAT01_10_R.BMP ÙuBL_S01_HAT01_11.BMP V<FL_S01_HAT01_11_R.BMP øLL_S01_HAT01_12.BMP Þ²SL_S01_HAT01_12_R.BMP ¹XL_S01_SHIRT01_01.BMP òh\L_S01_SHIRT01_02.BMP üŠkL_S01_SHIRT01_03.BMP _áxL_S01_SHIRT01_04.BMP ÌáL_S01_SHIRT01_05.BMP ‚{žL_S01_SHIRT01_06.BMP
¼©L_S01_SHIRT01_07.BMP 7Z±L_S01_SHIRT01_08.BMP EÁL_S01_SHIRT01_09.BMP 4ÇL_S01_SHIRT01_10.BMP <ÒÔL_S01_SHIRT01_11.BMP XâL_S01_SHIRT01_12.BMP ŸiëL_S01_SHIRT01_13.BMP
“ôL_S01_SHIRT01_14.BMP ÊŠýL_S01_SHIRT01_15.BMP üËL_S01_SHIRT01_16.BMP 5HL_S01_SHIRT01_17.BMP C0%L_S01_SHIRT01_18.BMP ÷U2L_S01_SHIRT01_19.BMP ¶ê>L_S01_SHIRT01_20.BMP 0‘IL_S01_SHIRT01_CLR_01.BMP $,TL_S01_SHIRT01_CLR_02.BMP æ8UL_S01_SHIRT01_CLR_03.BMP ÕVL_S01_SHIRT01_CLR_04.BMP ÿ:bL_S01_SHIRT01_CLR_05.BMP a¨bL_S01_SHIRT01_CLR_06.BMP UdeL_S01_SHIRT01_CLR_07.BMP lzfL_S01_SHIRT01_CLR_08.BMP MhL_S01_SHIRT01_CLR_09.BMP `<iL_S01_SHIRT01_CLR_10.BMP jL_S01_SHIRT01_CLR_11.BMP 1ÎjL_S01_SHIRT01_CLR_12.BMP ÚÓmL_S01_SHIRT01_CLR_13.BMP +ÊoL_S01_SHIRT01_CLR_14.BMP ‚pL_S01_SHIRT01_CLR_15.BMP óƒqL_S01_SHIRT01_CLR_16.BMP !nrL_S01_SHIRT01_CLR_17.BMP ŽsL_S01_SHIRT01_CLR_18.BMP }×sL_S01_SHIRT01_CLR_19.BMP ]9vL_S01_SHIRT01_CLR_20.BMP ÔÏvL_S01_SHOE_01.BMP ÆxL_S01_SHOE_02.BMP CL_S01_SHOE_03.BMP ç‹L_S01_SHOE_04.BMP 8eÓL_S01_SHOE_05.BMP x¹ãL_S01_SHOE_06.BMP ëL_S01_SHOE_07.BMP \ÚL_S01_SHOE_08.BMP øù1L_S01_SHOE_09.BMP ÚQL_S01_SHOE_10.BMP 5.qL_S01_SHOE_11.BMP âìL_S01_SHOE_12.BMP Z6«L_S01_SKIN_01.BMP +ÅÃL_S01_SKIN_02.BMP ‡úÑL_S01_SKIN_03.BMP øKàL_S01_SKIN_04.BMP TîL_S01_SKIN_05.BMP ÅÒüL_S01_SKIN_06.BMP !L_S01_SKIN_07.BMP .NL_S01_SKIN_08.BMP 7%L_S01_SKIN_09.BMP Œ#3L_S01_SKIN_10.BMP lAL_S01_SKING_01.BMP ‡½OL_S01_SKING_02.BMP 5«_L_S01_SKING_03.BMP °ŸmL_S01_SKING_04.BMP ^}L_S01_SKING_05.BMP Ù‹L_S01_SKING_06.BMP ‡o›L_S01_SKING_07.BMP |©L_S01_SKING_08.BMP ‹ì´L_S01_SKING_09.BMP ¶´ÂL_S01_SKING_10.BMP ¼SÐSCRIPT.TXT 7HÞL_S01_PANTS01_01.BMP ÑUÞL_S01_PANTS01_02.BMP ¾.êL_S01_PANTS01_03.BMP crL_S01_PANTS01_04.BMP Ë!L_S01_PANTS01_05.BMP äDL_S01_PANTS01_06.BMP Ê"bL_S01_PANTS01_07.BMP ŠwL_S01_PANTS01_08.BMP Cx—L_S01_PANTS01_09.BMP Øu¾L_S01_PANTS01_10.BMP EvîL_S01_PANTS01_11.BMP ù†L_S01_PANTS01_12.BMP pí@L_S01_PANTS01_13.BMP $vfL_S01_PANTS01_14.BMP •£„L_S01_PANTS01_15.BMP r©¦L_S01_PANTS01_16.BMP DdÊL_S01_PANTS01_17.BMP ÕuóL_S01_PANTS01_18.BMP L_S01_PANTS01_19.BMP ~²L_S01_PANTS01_20.BMP ƒŸ1L_S01_FACE_01.BMP ЩCL_S01_FACE_02.BMP qXL_S01_FACE_03.BMP ajL_S01_FACE_04.BMP
As I wrap this post up, I wanted to explain when/why I use graphics software and what software I used and how it fit into my process. I'm really trying to not only explain the technical info on the ani, but the process I use to create them. I also wanted to explain how the different versions of the golfer utility came to be. I cant emphasize enough that I didn't know a damn thing about any of this stuff at the beginning. I'm stubborn as hell and had a good why (we needed more anis) and had just enough IT knowledge to connect the dots along the way. At the end of the day, getting in contact with 3 very crucial original MS/Animaster folks put the finishing touches on my journey.
-
Big Sexy JC
- Posts: 307
- Joined: November 15th, 2022, 8:10 am
- Location: Indiana
Re: The Anatomy of an Ani
I found some software for a great price (free) that allows me to video capture some of the stuff I'm doing in PSP and the Golfer Utility so I might be able to just record while I do some of this stuff now. The first video I did was creating a shirt in PSP 7.0. The link to that video is below and is also on my website.
Shirt Video
https://video.wixstatic.com/video/58409 ... 4/file.mp4
Shirt Video
https://video.wixstatic.com/video/58409 ... 4/file.mp4
Last edited by Big Sexy JC on January 13th, 2025, 8:43 am, edited 1 time in total.
-
Big Sexy JC
- Posts: 307
- Joined: November 15th, 2022, 8:10 am
- Location: Indiana
Re: The Anatomy of an Ani
I added two more tutorial videos to my site. How to make pants and shoes in Paint Shop Pro.
Pants Video
https://video.wixstatic.com/video/58409 ... 4/file.mp4
Shoes Video
https://video.wixstatic.com/video/58409 ... 4/file.mp4
Pants Video
https://video.wixstatic.com/video/58409 ... 4/file.mp4
Shoes Video
https://video.wixstatic.com/video/58409 ... 4/file.mp4